There’s nothing quite like waking up to the crisp morning air in the wilderness, with the scent of pine trees and the sounds of nature all around. And what makes that experience even better? A hot cup of freshly brewed coffee over an open fire. Whether you’re a seasoned camper or a beginner, making coffee in the great outdoors can be a rewarding ritual. In this guide, we’ll explore the best methods, equipment, and tips to ensure you get a perfect cup of coffee while camping.
Essential Equipment for Brewing Coffee Over an Open Fire
Before you start brewing, it’s important to gather the right tools. Unlike brewing at home, where you have access to modern appliances, brewing coffee while camping requires simple, durable, and heat-resistant gear. Here’s what you’ll need:
- Fireproof Coffee Pot or Kettle – A stainless steel or enamel kettle works best for heating water over an open flame.
- Coffee Grounds – Choose pre-ground coffee for convenience or bring a manual grinder if you prefer fresh-ground beans.
- Water – Always use fresh, clean water. If you’re using water from a natural source, be sure to filter or boil it first.
- Heat Source – An open fire is ideal, but a camp stove can also work in case of fire restrictions.
- Coffee Brewing Method – Depending on your preference, you can use a percolator, French press, pour-over, or the classic cowboy method.
Now, let’s explore different ways to brew coffee over an open fire.
Method 1: Cowboy Coffee – The Classic and Simple Approach
Cowboy coffee is one of the simplest ways to make coffee in the wild. It requires no fancy equipment—just a pot, water, and coffee grounds.
Steps to Make Cowboy Coffee:
- Heat Water – Fill your coffee pot with water and place it over the fire. Let it heat until it reaches a near-boiling point.
- Add Coffee Grounds – For every 8 ounces of water, add about 2 tablespoons of coffee grounds. Stir the mixture and let it sit.
- Simmer and Settle – Allow the coffee to simmer for about 4-5 minutes, then remove it from the fire. Let the grounds settle at the bottom.
- Pour and Enjoy – Slowly pour the coffee into your mug to avoid getting too many grounds. If needed, use a fine mesh strainer.
This method produces a strong, unfiltered coffee with a bold flavor.
Method 2: Percolator – A Reliable Camping Favorite
A percolator is a great option if you want a more traditional brewed coffee experience. It’s designed for use over an open flame and can produce rich, aromatic coffee.
Steps to Use a Percolator:
- Fill with Water – Pour clean water into the bottom chamber of the percolator.
- Add Coffee Grounds – Place medium-ground coffee into the filter basket (use about 1 tablespoon per cup of water).
- Assemble and Heat – Put the percolator on the fire and allow it to heat up slowly. The water will bubble up through the grounds.
- Monitor the Brewing Time – Watch for the characteristic bubbling sound and rich brown color in the percolator’s top glass knob. It typically takes 5-10 minutes.
- Remove and Serve – Carefully remove the percolator from the fire, let it sit for a minute to settle, and pour yourself a hot cup.
Percolators are ideal for making multiple cups at once, making them great for group camping trips.
Method 3: French Press – A Smooth and Flavorful Choice
If you enjoy smooth, rich coffee, the French press method is an excellent choice, even while camping. It requires a bit more preparation but delivers a fantastic cup.
Steps for French Press Coffee While Camping:
- Boil Water – Heat water in a kettle over the fire until it reaches about 200°F (just below boiling).
- Prepare Coffee Grounds – Use coarsely ground coffee, about 2 tablespoons per 8-ounce cup of water.
- Combine and Steep – Add coffee grounds to the French press, pour in hot water, and stir. Let it steep for 4 minutes.
- Press and Pour – Slowly press the plunger down to separate the grounds, then pour and enjoy.
The French press delivers a rich, full-bodied coffee and works well for campers who don’t mind bringing an extra piece of gear.
Method 4: Pour-Over – Lightweight and Easy for Backpacking
The pour-over method is perfect for those who want a clean and smooth cup of coffee with minimal equipment.
Steps to Make Pour-Over Coffee:
- Boil Water – Heat water in a kettle or pot over the fire.
- Set Up the Filter – Place a paper or metal filter over a pour-over cone or collapsible dripper.
- Add Coffee Grounds – Use medium-coarse grounds, about 2 tablespoons per cup of water.
- Slowly Pour Water – Pour hot water over the grounds in a slow, circular motion to evenly extract the flavors.
- Enjoy – Once brewed, discard the grounds and sip your smooth, delicious coffee.
This method is great for lightweight backpackers who want a refined coffee experience.
Tips for Brewing the Perfect Campfire Coffee
- Use Fresh Coffee – Freshly ground beans provide the best flavor. If possible, bring a manual grinder.
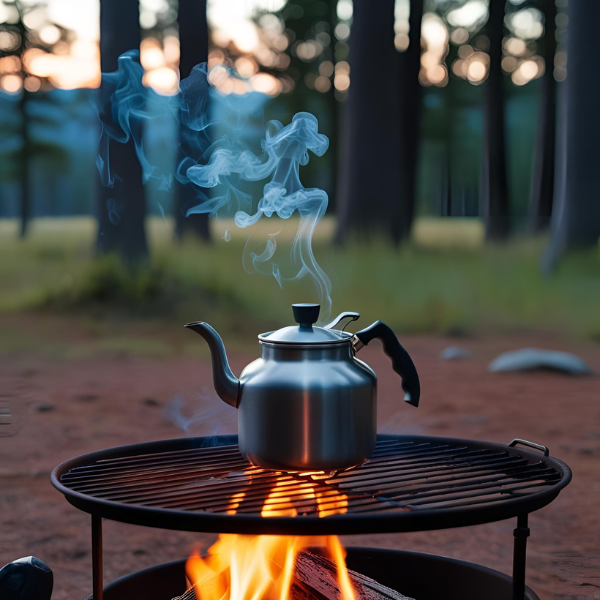
- Control the Heat – Avoid placing your pot directly in the flames; instead, use hot coals or a grill grate for even heating.
- Pre-Measure Coffee – Pre-pack coffee grounds in small containers or bags to avoid spills and guesswork.
- Let Grounds Settle – If using cowboy coffee or a percolator, let the coffee sit for a minute before pouring to allow the grounds to settle.
- Pack Out Your Waste – Always clean up your coffee grounds and dispose of them properly to follow Leave No Trace principles.
Enjoying the Moment
One of the best things about brewing coffee over an open fire while camping is the experience itself. Taking the time to prepare and savor your coffee in nature can be incredibly relaxing. Whether you’re enjoying a solo trip or sharing stories with friends around the fire, that first sip of campfire coffee is always special.
So next time you head into the wilderness, bring along your coffee gear and make your mornings even more memorable. Happy camping and happy brewing!